Best Capacity for A1708 Non-TB
A1708 SSD Hard Drive 1TB

- 1TB NVMe PCIe Gen3x4 module for MacBook Pro A1708 only
- macOS Catalina preinstalled; up to 2150 MB/s read claimed
- Requires matching EMC 2978 or 3164 non-Touch Bar chassis
Expert Review & Guide
If you still rely on a mid-2010s MacBook Pro, a storage upgrade is often the single most useful repair you can do before the machine feels finished. The catch is that “best SSDs for MacBook Pro” does not mean one universal stick that drops into every chassis. Apple used proprietary connectors on several generations, then soldered storage onto the logic board starting with many 2018 and newer models. That split defines this entire buying decision in 2026: either you own a serviceable older Pro or Air with a known model and EMC number, or you own a modern soldered machine and need a fast external drive instead.
Most products in this guide are internal NVMe modules built for specific Apple part numbers. They are not generic M.2 2280 sticks from a PC parts aisle. Several listings target MacBook Pro A1708 non-Touch Bar machines from 2016–2017. Others fit the earlier Retina generation—A1398 and A1502—plus MacBook Air A1465 and A1466 from roughly Mid 2013 through Mid 2017. Almost every internal option warns the same non-negotiable step: update the original drive to macOS 10.13 High Sierra or later before you remove it, so the EFI firmware update that recognizes third-party NVMe modules is already on the machine.
We also include one SanDisk Extreme portable SSD for owners of Touch Bar, T2, and Apple Silicon MacBook Pros that cannot accept a DIY internal swap. That is not a consolation prize; on a soldered Mac it is the only practical capacity path. Below you will find ten pack products ranked for careful DIY buyers who check model stickers, back up first, and prefer honest compatibility notes over vague “works with all MacBooks” marketing.

As an Amazon Associate we earn from qualifying purchases. We may earn a commission at no additional cost to you.
Use this table as a model filter first, capacity second. Internal modules only fit the Apple identifiers listed; the SanDisk Extreme is the external option for machines whose storage cannot be replaced. Specs summarize connector generation, capacity, and the practical role each drive fills—not street prices.

The ON900A-style 512GB module is a practical middle ground for owners who want more breathing room than a tired 128GB or 256GB factory drive without jumping straight to a terabyte. It is aimed at the generation of Macs that still used a proprietary blade-style SSD rather than soldered NAND. That includes MacBook Air models in the A1465 and A1466 families, MacBook Pro Retina A1502 and A1398 machines from the mid-decade Retina years, plus a handful of desktop Macs listed in the pack. If your sticker says A1708, or if you own a Touch Bar or Apple Silicon Pro, this is the wrong product category entirely.
Performance claims put sequential reads near 2150 MB/s and writes near 1650 MB/s under PCIe Gen3 x4. On a 2013–2015 MacBook Pro that once shipped with a much slower module, that difference shows up as shorter boot times, snappier app launches, and less waiting when exporting projects. Real-world numbers always depend on the host controller, cable path inside the chassis, and whether TRIM and background maintenance are healthy after the reinstall. Treat the marketing ceiling as a best-case figure, not a bench guarantee on every EMC variant.
Compatibility work is more important than the speed headline. The listing asks you to verify model and EMC before purchase, then to back up the original drive and confirm macOS 10.13 High Sierra or later is already installed. That High Sierra (or newer) step carries an EFI firmware update Apple shipped for these machines. Skip it, and a brand-new third-party NVMe stick can sit invisible after you close the case. If the drive does not appear, the seller guidance is to recheck seating and install steps, then contact support—not to keep reformatting blindly.
Unlike some kits in this roundup, this pack entry emphasizes reinstalling macOS yourself rather than promising a turnkey boot every time. You can restore from Time Machine, boot from a USB installer, or use Internet Recovery after you erase the new SSD in Disk Utility. That flexibility is good for careful repairers who already keep a bootable installer on hand. It is less comforting if you hoped to pop the drive in and land on a desktop without touching recovery tools. Plan an afternoon, not a ten-minute lunch swap.
Who should buy this specific 512GB cut? Someone with a confirmed compatible Air or Retina Pro who mostly needs documents, browsers, Lightroom catalogs, and a modest media library. If you are already parking camera originals on an external disk, half a terabyte can feel generous again. If the machine is your only archive for 4K footage, look at the 1TB FM13A or MAC SSD options later in this guide instead. And if your MacBook Pro is a 2016–2017 non-Touch Bar A1708, ignore this listing and jump to the A1708-specific modules—different connector, different pinout, different parts.
One more honesty check for 2026: these older chassis may still run well for writing, studying, and light creative work, but battery health and keyboard wear are separate problems. An SSD upgrade will not fix a swollen pack or a failing display cable. Pair the drive swap with a sober assessment of the rest of the machine so you are not investing install time into a laptop that needs more expensive board work next month.
Update the stock SSD to High Sierra or later while the original drive is still installed. Only then power down, open the bottom case, and swap modules. That sequence is the difference between a clean first boot and a blank recovery screen.
Keep system files, apps, and active projects on the internal disk; offload archives to the SanDisk Extreme or another external. That hybrid workflow stretches a mid-capacity upgrade without forcing a terabyte purchase.
We may earn a commission at no additional cost to you.
Among the A1708-only options in this pack, the 1TB Jorkar module is the capacity pick we would send to someone whose 13-inch 2016 or 2017 non-Touch Bar MacBook Pro is still mechanically sound. Those machines were the last MacBook Pros with a user-accessible proprietary SSD blade before Apple moved to soldered storage on many later Pros. If your underside sticker reads A1708 with EMC 2978 (2016) or EMC 3164 (2017), this connector family is the one you want. If it reads A1706 or A1707, stop—those Touch Bar siblings do not take this part.
The seller positions the drive as a direct capacity and speed upgrade with reads up to 2150 MB/s and writes up to 1650 MB/s on the 1TB cut. For a machine that may have shipped with a small factory SSD, that change can postpone a full hardware replacement for years of office work, coding, and light creative production. You are not buying Apple Silicon performance; you are buying usable internal space and a fresher NVMe stack on a chassis you already know.
Preinstalled macOS Catalina is the practical differentiator versus bare modules. Many first-time DIY owners freeze after a successful physical install because they have never built a bootable installer. Landing on a preloaded system lets you boot, sign in, and then decide whether to upgrade further through Apple’s software update path. If you need a newer major version than Catalina, plan that update after you confirm the drive is recognized and healthy.
The important note on the listing is non-negotiable and identical in spirit to every serious A1708 aftermarket drive: back up to a USB drive before removal, and make sure the original SSD already runs macOS 10.13 High Sierra or later. Without that firmware-bearing OS update, the replacement can fail to enumerate. This is not optional folklore; it is the most common reason “my new MacBook SSD does not show up” threads exist.
Installation still requires opening the bottom case, disconnecting the battery when the service guide says so, and seating the proprietary module firmly. If you have never opened an A1708, watch a model-specific teardown first and use a pentalobe driver that fits Apple’s bottom screws. Magnetic tip trays help when you are working over carpet. After the swap, expect to reconnect Wi-Fi, re-enable FileVault if you use it, and migrate data from your backup rather than assuming Catalina’s preload includes your old home folder.
We like this 1TB cut as a top pick because A1708 owners who stuck with the machine into 2026 usually did so for keyboard familiarity or a specific port layout—and they are almost always storage-starved. Half a terabyte helps; a full terabyte changes how you use the laptop day to day. Just stay ruthless about compatibility: non-Touch Bar A1708 only, matching EMC, High Sierra-or-later prerequisite, backup first.
Apple → About This Mac → System Report, or the underside regulatory sticker, should show A1708 plus EMC 2978 or 3164. Touch Bar Pros from the same years look similar until you check the model number—do not guess from the year alone.
Run Software Update if you need a newer macOS the machine still supports, reinstall apps from your backup, and verify Disk Utility SMART status. Keep the old SSD labeled in an antistatic bag as emergency recovery media.
Owners of 2018 and newer MacBook Pros, any Apple Silicon Mac, and 2016–2017 Touch Bar models should look at the SanDisk Extreme portable instead of any A1708 internal listing.
We may earn a commission at no additional cost to you.
MAC SSD 1TB Compatible with Apple MacBook Air
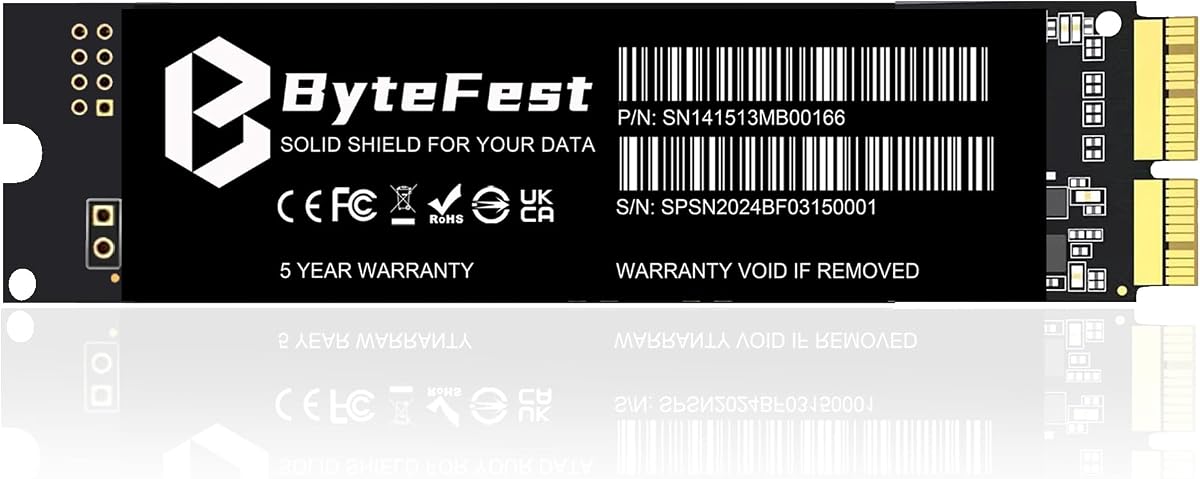
This 1TB MAC SSD sits in the same broad family as the FM13A kits—native Mac interface upgrades for Mid 2013 through Mid 2017 Airs and Late 2013 through Mid 2015 Retina Pros—but it arrives as a capacity-forward drive with an especially dense compatibility list. The pack about text spells out EMC ranges for A1465, A1466, A1398, A1502, plus desktop cousins. That level of specificity is what you want in 2026, when vague “2013–2017 MacBook” blurbs still trick people into buying the wrong blade.
Speed claims for the 1TB cut reach about 2200 MB/s read and 1800 MB/s write using 3D NAND on a PCIe NVMe path. Those numbers put it in the same performance neighborhood as other aftermarket Gen3 modules for this chassis generation. Day to day, the bigger win is usually space: moving from a factory 256GB to a terabyte means keeping current projects, a local photo library, and a few virtual machines without constant external juggling.
Preinstalled macOS is meant to remove the blank-drive panic. Boot, confirm recognition, then upgrade through Apple’s channels if you need a newer major release than what ships on the stick. The listing still insists on updating the host Mac to macOS 10.13 High Sierra, 10.14 Mojave, or 10.15 Catalina or later before you pull the old SSD. Those versions include the EFI firmware updates that make third-party NVMe modules visible. Treat that as a hard gate.
Reliability language around TRIM, S.M.A.R.T, NCQ, ECC, and garbage collection is marketing-speak for “we implemented the usual SSD housekeeping features.” After install, leave the system plugged in occasionally so TRIM and maintenance tasks can run, and avoid filling the drive to the last gigabyte. SSDs of every brand slow and wear harder when they never have free blocks.
Choose this over the FM13A 1TB kit if you already own pentalobe and Torx drivers and do not need the bundled USB installer. Choose the FM13A kit if this is your first bottom-case opening and you want screwdrivers plus a Big Sur installer in the box. Either way, print or screenshot the EMC table from the listing and match it to your sticker before money leaves your account.
One caution for Pro owners: Late 2013–Mid 2015 A1398 and A1502 machines are the sweet spot. Later Pros with Touch Bar or soldered storage are outside this product’s universe. If you are unsure which Retina generation you hold, the model identifier in System Information is more trustworthy than memory of the purchase year.
Two machines can share a marketing year and still need different parts. Cross-check every digit of the EMC on the underside label against the seller’s list. Partial matches are failures waiting to happen.
If you also maintain a Late 2014 Mac mini or a Late 2013 Mac Pro with a listed EMC, the same SKU family may cover a second machine—confirm each chassis independently rather than assuming one purchase fits both.
We may earn a commission at no additional cost to you.

256GB NVMe SSD for MacBook Pro A1708
Bitsjour’s 256GB A1708 module is the entry-capacity sibling of the larger A1708 sticks in this guide. It uses Apple’s proprietary 22+34 pin layout so the blade seats like the original part without a translation adapter. Adapters introduce another failure point; a native connector is the saner repair path when the pinout is correct.
The performance story is PCIe Gen3 x4 with claimed reads up to 2250 MB/s and writes up to 1850 MB/s using factory-sourced TLC NAND language in the listing. On a tired original module, even the jump to a healthy 256GB aftermarket drive can restore snappy Finder behavior and shorter Xcode or Office launch times. Capacity, however, remains the limiting factor. If you already bounce off storage warnings weekly, spend up to the 1TB Jorkar or MZ17C options instead of celebrating a clean but still cramped install.
Ease of install is the marketing hook: macOS is preinstalled so the workflow is replace, boot, and continue. That helps people who do not want to craft a USB installer on a second computer. You still need the High Sierra-or-later prerequisite on the donor machine before the old drive comes out. The listing is blunt that pre-10.13 hosts are unsupported for recognition after the swap.
Compatibility text narrows the field to MacBook Pro 13-inch 2016 A1708 EMC 2978 and 2017 A1708 EMC 3164, both non-Touch Bar. That is a small island in Apple’s lineup, but it is a common one in secondhand markets because those models avoided the Touch Bar and kept the function-key layout many typists prefer. Confirm both identifiers; year alone is not enough.
We would recommend this Bitsjour 256GB when the laptop’s original drive has failed or is tiny, and the owner’s workflow is email, browser, documents, and cloud-synced files. Pair it with the SanDisk Extreme if you occasionally need a big scratch disk for exports. If the machine is your sole photo archive, the 256GB ceiling will frustrate you within months.
Warranty coverage listed at five years is longer than some competing A1708 kits that advertise three. Warranty length does not guarantee cells never fail, but it signals the seller expects to stand behind recognition and DOA issues—keep your order records and the original packaging until the drive has survived a few weeks of daily boots.
Generic M.2-to-Apple adapters can work in hobbyist builds, yet they add thickness, heat, and loose-fit risk. A purpose-cut 22+34 pin module is the cleaner A1708 repair when you can source one.
Leave at least 20 percent free after migration. A full 256GB SSD feels slower and has less room for system updates and virtual memory.
We may earn a commission at no additional cost to you.
Every other product in this pack assumes you can open a Mac and replace a blade. The SanDisk Extreme 2TB portable exists for the opposite reality: 2018 and newer Touch Bar MacBook Pros, T2 machines, and Apple Silicon MacBook Pros whose NAND is soldered to the logic board. No responsible DIY guide should imply those owners can drop in an A1708 or FM13A stick. They cannot. An external NVMe enclosure-style drive is the honest capacity path.
SanDisk rates this older Extreme generation up to 1050 MB/s read and 1000 MB/s write over USB 3.2 Gen 2 with a USB-C connection. On a MacBook Pro Thunderbolt/USB-C port, that is fast enough for scratch disks, Lightroom libraries, multi-track audio sessions, and offline media caches when the cable and port negotiate full speed. Performance still depends on the host, the cable, and thermal throttling during long transfers—SanDisk’s own notes say results vary.
The ruggedization story matters if you actually leave the office. IP65 water and dust resistance, updated from an earlier IP55 claim in SanDisk’s materials, plus drop protection around the three-meter class, make this a better bag companion than a fragile bare enclosure. The carabiner loop is a small detail that prevents the classic “SSD left on a cafe table” loss. For travel editors and campus users, that physical durability is part of the product, not an accessory footnote.
Password protection with 256-bit AES hardware encryption helps when the drive holds client footage or personal archives. Encryption is only useful if you enable it and store the password in a manager you can still access when the Mac is wiped. The SanDisk Memory Zone app is offered for file management and freeing space; on macOS you can also treat the volume like any other APFS or exFAT disk depending on how you format it for cross-platform needs.
Be clear about what this drive does not do. It will not replace a failed internal SSD on a soldered MacBook Pro—that requires board-level service. It will not make an M-series machine boot from a tiny internal partition feel larger; it only expands what you can store and edit externally. For owners of upgradeable 2013–2017 machines, an internal 1TB module plus this Extreme as a field drive can be a powerful pairing, but the Extreme alone is the correct “best SSD” answer when the Pro cannot be opened for storage.
Title labeling calls out “Old Model,” which is useful honesty. Firmware updates and cable quality still matter; use a short, known-good USB-C cable rated for the bus speed you expect. If you need the absolute newest Extreme revision with different peak numbers, compare current SanDisk SKUs—but within this pack, the 2TB Extreme remains the modern-Mac pick because it is the only external option present.
Use APFS if the drive stays with macOS only. Choose exFAT when you must exchange files with Windows edit bays, accepting the usual large-file and metadata tradeoffs.
Upgradeable A1398/A1502/A1466/A1708 non-TB: prefer an internal module. Soldered 2018+ or Apple Silicon: buy this class of portable and stop searching for mythical internal blades.
Keep a second backup of irreplaceable shoots. A rugged SSD is not a substitute for a second copy on another disk or cloud vault.
We may earn a commission at no additional cost to you.
Jorkar’s 512GB A1708 drive is the middle rung between the Bitsjour 256GB entry module and the 1TB capacity pick. Compatibility rules are identical: MacBook Pro A1708, 2016 EMC 2978 or 2017 EMC 3164, non-Touch Bar only. Model and EMC must both match. That repetition is deliberate—wrong-chassis returns are the plague of this category.
Where the 1TB sibling ships with Catalina preinstalled, this 512GB cut is described as preinstalled with macOS High Sierra 10.13. That is older, but it sits at the exact OS generation that introduced the firmware expectations for these upgrades. After you confirm a clean boot, you can move to a newer macOS still supported on A1708 hardware. The listing notes that changing to the regional language can be part of getting an update installation to begin—follow the seller’s update notes if the installer seems stuck.
Speed language mirrors the family claims: reads up to 2150 MB/s and writes up to 1650 MB/s, with the caveat that newer hosts and larger capacities often show stronger results in vendor testing. For everyday writing, coding, and classroom use, 512GB is often the sweet spot if your media lives on a NAS or the SanDisk Extreme. You get headroom without paying for a terabyte you will not fill.
Before removal, back up the original SSD. That instruction appears on nearly every A1708 listing because the moment the old drive leaves the slot, your only fallback is the backup you already made. Clone or Time Machine to an external disk, verify the backup opens, then proceed. If the upgrade fails recognition, you can reseat or temporarily return the original module while you troubleshoot.
Compared with the MZ17C 1TB kit later in this guide, the Jorkar 512GB is simpler if you do not need bundled screwdrivers and a Monterey USB installer. Compared with the Bitsjour 256GB, it gives you a more comfortable working set for modern app sizes. Pick based on how much of your life still lives in ~/Documents versus the cloud.
A1708 machines in 2026 are aging laptops. Pair this upgrade with a battery health check and a realistic look at whether cracked keycaps or a dim backlight will bother you more than storage ever did. An SSD swap is satisfying precisely because it is contained; it should not become the first of five deferred repairs you cannot afford.
Expect an older desktop on first boot. Update deliberately after you confirm Disk Utility sees the volume and after your backup migration plan is ready.
Choose 512GB for cloud-centric work. Choose the 1TB Jorkar when local video proxies, sample libraries, or large Xcode derived data must stay internal.
We may earn a commission at no additional cost to you.

256GB NVMe SSD Replacement for MacBook Air
Bitsjour’s 256GB 12+16 pin module is the Air and early Retina Pro counterpart to the A1708 Bitsjour stick. Different connector, different years, same repair philosophy: match the proprietary interface, preload macOS, and warn buyers about the 10.13 firmware gate. It targets MacBook Air A1465 and A1466 (with listed EMCs through Mid 2017 on some 13-inch configurations), MacBook Pro Retina A1502 and A1398 from Late 2013 through Mid 2015, plus selected iMac, Mac mini 2014, and Late 2013 Mac Pro identifiers.
The “perfect match and stable” claim rests on skipping adapters. For these chassis, aftermarket sellers learned that floating a standard M.2 drive on a carrier board can work but also can introduce seating drama. A native pin layout that mirrors the original blade is easier to trust when you are elbow-deep in a thin Air.
Performance claims again land near 2250 MB/s read and 1850 MB/s write. That is ample for the CPU and GPU class inside a Mid 2010s Air or Retina Pro. Bottlenecks after the upgrade usually shift back to RAM limits, thermal paste age, or a worn battery—not the SSD. If your Air feels slow after a successful swap, look at Activity Monitor memory pressure before blaming the new drive.
Preinstalled macOS makes this attractive as a rescue part when the original SSD has failed completely and you lack a second Mac to build installers. Still complete the High Sierra-or-later update on a working original drive whenever that drive still boots. If the original is already dead, you may need a bootable installer and the seller’s support path; do not assume every failed-drive scenario is a five-minute preload boot.
Capacity advice is blunt: 256GB is a repair size, not a media vault. Students and writers who live in cloud docs will be fine. Photographers should plan an external companion immediately. The high pack rating suggests many buyers got exactly that “my Air boots again” outcome—just go in with eyes open about free space.
Cross-shop this against the FM13A 256GB kit if you need screwdrivers and a USB installer in the box. Cross-shop against the 1TB MAC SSD or FM13A 1TB if the chassis is healthy and you want the upgrade to feel like a new machine rather than a patched one.
Air bottom cases and Retina Pro bottom cases differ, but this module family covers both when EMC lists allow. Always open a guide for your exact model so screw maps and battery disconnect steps match.
If the original SSD never mounts, prepare a bootable installer on another computer before surgery day. Preloads help, yet recovery muscle still saves nights.
We may earn a commission at no additional cost to you.

The FM13A 256GB kit is less about peak megabytes per second and more about reducing DIY failure modes. In the box you get the PCIe NVMe module preloaded with Catalina, a 16GB USB bootable installer with Big Sur, two screwdrivers for the bottom case and SSD screws, and a QR-linked installation guide. For a first-timer staring at a Mid 2014 Air with a full disk, that bundle matters more than another hundred MB/s on a spec sheet.
Compatibility covers MacBook Air A1465 and A1466 from Mid 2013 through Mid 2017, MacBook Pro A1502 and A1398 from Late 2013 through Mid 2015, and iMac A1418/A1419 from Late 2013 through Mid 2017—always with the EMC table as the final authority. The seller is explicit that EMC matching is the best way to avoid a dead-on-arrival experience.
Speed ratings for this 256GB cut are up to about 1700 MB/s read and 1300 MB/s write. That is slower on paper than several Bitsjour and MAC SSD claims, yet still a night-and-day upgrade from a failing OEM module. Different machines test differently, as the listing notes. Prioritize clean seating and a successful boot over chasing synthetic peaks.
The High Sierra-or-later prerequisite appears again because Apple’s EFI update lives in that OS generation. Install the update on the original drive, back up, then swap. If the new module misbehaves, the included Big Sur USB installer gives you a second runway that bare drives do not provide. Keep that USB labeled and stored with the old SSD.
We recommend this kit when the buyer is tool-poor and capacity-modest: a student Air, a secondary Retina Pro for travel writing, or an iMac that mostly browses and stores documents. If you already own the correct drivers and need a terabyte, step up to the FM13A 1TB kit that shares the same philosophy with more space.
Three-year warranty coverage is shorter than some five-year Bitsjour claims, yet the inclusion of tools and a bootable installer is real value for nervous first repairs. Budget a calm evening, good lighting, and a parts tray. Rushing pentalobe screws is how bottom cases get chewed.
Use it when the preload does not boot cleanly, when you want a newer installer environment, or when Disk Utility needs a known-good external macOS to erase and restore the internal volume.
Bundled drivers are adequate for one careful install. If you service Macs often, graduate to a dedicated pentalobe and Torx set and keep the kit bits as spares.
We may earn a commission at no additional cost to you.

1TB MZ17C PCIe NVMe SSD for A1708
The MZ17C 1TB kit is the A1708 answer for buyers who want terabyte capacity and do not already own Mac opening tools. Compatibility is tightly scoped: MacBook Pro Retina A1708 Late 2016–Mid 2017, EMC 2978 or EMC 3164, non-Touch Bar only. The listing explicitly refuses 2016–2017 MacBook Pro A1706 and A1707. That refusal is a feature; vague sellers cause expensive mistakes.
In the box: the 1TB SSD, a 16GB USB bootable installer with macOS Monterey 12, two screwdrivers for the bottom panel and SSD screws, and a USB to USB-C adapter. The Monterey installer is noteworthy because several competing kits stop at Catalina or Big Sur media. Having a newer installer on hand helps when you want to land closer to a modern software stack after hardware surgery.
Read and write claims sit around 1700 MB/s and 1400 MB/s with 3D TLC NAND on PCIe 3.0 x4. Those figures are conservative next to some 2150 MB/s marketing lines elsewhere in the pack. In practice, A1708 owners will still feel a major lift over a degraded original module. Consistency and recognition matter more than winning a synthetic chart against another aftermarket blade.
The important note matches the rest of the A1708 category: update the original SSD to macOS 10.13 High Sierra or later before removal. If the old drive is stuck on Sierra 10.12 or earlier, the new SSD may not be recognized after replacement. Do the OS update first even if it feels tedious on a nearly full disk—free space, update, back up, then open the case.
Choose MZ17C over Jorkar 1TB when you specifically want the tool bundle and Monterey USB in one shipment. Choose Jorkar when you already have tools, prefer the Catalina preload approach, or are chasing the higher sequential claims and five-year warranty language. Both still demand the same model discipline.
After install, boot from the internal preload or the Monterey USB as needed, erase only when you intend to reinstall cleanly, and migrate from the backup you verified earlier. Keep the USB-C adapter with the kit; older USB installers sometimes need that bridge depending on which ports and flash drives you use during recovery.
A1706 and A1707 can look nearly identical on a desk. Check the model identifier before ordering. Touch Bar presence is a quick visual clue, but the A-number is decisive.
A newer installer can simplify landing on a supported OS after hardware changes, especially if Apple’s Internet Recovery path on an aging machine is slow or flaky on your network.
We may earn a commission at no additional cost to you.
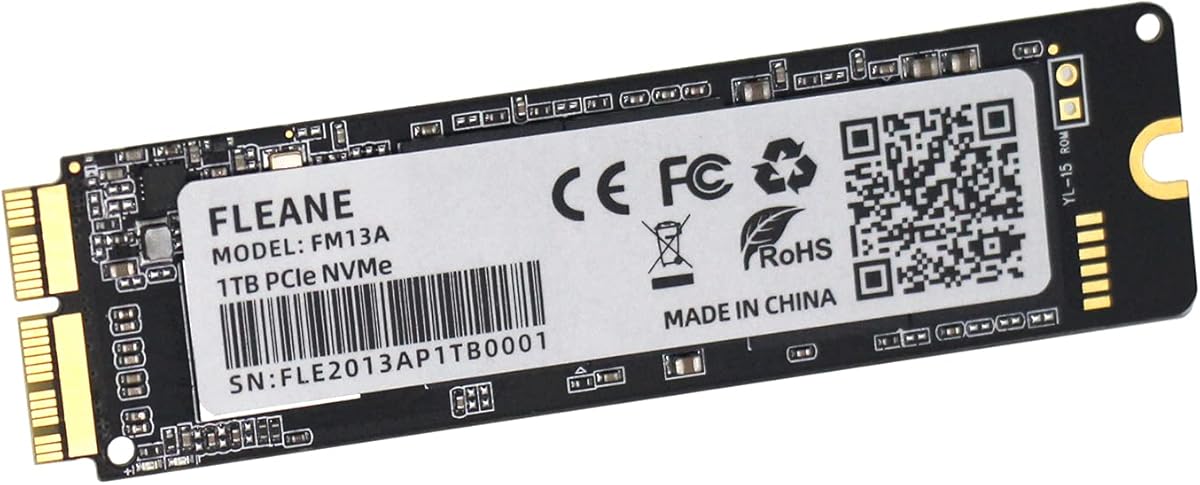
If the Jorkar 1TB is our A1708 capacity pick, the FM13A 1TB kit is the corresponding choice for the earlier Retina Pro and Mid 2010s Air generation. It combines a full terabyte PCIe 3.0 x4 NVMe module with the same practical kit philosophy as the 256GB FM13A: Catalina preloaded on the SSD, a 16GB Big Sur USB installer, two screwdrivers, and a QR-linked guide. For owners who have never opened a MacBook, that packaging is the difference between ordering a part and completing a repair.
Compatibility again centers on MacBook Air A1465/A1466 Mid 2013–Mid 2017, MacBook Pro A1502/A1398 Late 2013–Mid 2015, and iMac A1418/A1419 Late 2013–Mid 2017, with EMC matching as the decisive check. The 1:1 original interface claim means you are not stacking an adapter in a chassis that was never designed for one. Seat the blade fully, secure the screw, and reassemble without forcing cable paths.
Speed claims rise with capacity versus the 256GB FM13A: up to roughly 1850 MB/s read and 1550 MB/s write on the 1TB cut. That is competitive for this Mac generation and enough to make Final Cut proxy work or large Lightroom catalogs feel less punishing on internal storage. As always, host limits and thermal design still apply; an old 15-inch A1398 will not magically become an M4 Pro.
The firmware prerequisite is unchanged. Install macOS 10.13 High Sierra or later on the original SSD so the EFI update is present, back up thoroughly, then perform the swap. If first boot from the preload is odd, use the Big Sur USB installer to run Disk Utility, erase intentionally, and install cleanly. That two-path approach is why we prefer this kit over bare 1TB modules for less experienced hands.
As a top pick, the FM13A 1TB earns its badge because the 2013–2015 Retina Pro audience is still large on the used market, and those machines are often storage-starved long before the displays or keyboards give up. A terabyte internal drive plus occasional external archive use can keep a well-kept A1398 useful for writing, coding, and photo work well into 2026. Just do not buy it for a 2019 or M-series MacBook Pro—those need the SanDisk Extreme path.
After the upgrade, spend thirty minutes on system hygiene: turn on TRIM if your utility workflow requires verification, enable automatic backups again, and note the serial and EMC in your repair log. Future you will thank present you when shopping for a battery or display later.
If the chassis is worth keeping two more years, the terabyte cut prevents a second open-and-swap cycle when apps and photo libraries grow. Pay the capacity premium once.
The same kit family can revive a Late 2013–2017 iMac with a listed EMC. Confirm desktop service steps separately—iMac openings are not MacBook openings.
If screws strip, cables resist, or the battery looks swollen, close the machine and consult a repair shop. No SSD bargain is worth a damaged logic board flex cable.
We may earn a commission at no additional cost to you.
Apple’s year labels are messy across configurations. Open Apple menu → About This Mac → System Report and write down the Model Identifier (for example MacBookPro13,1) alongside the A-number and EMC printed on the underside. Internal upgrades in this guide only work when both model and EMC appear on the seller’s list. A1708 non-Touch Bar is a different universe from A1398 Retina, and both are different from soldered 2018+ Pros.
As a practical rule for this pack: 2018 and newer Touch Bar MacBook Pros, many T2 machines, and all Apple Silicon MacBook Pros do not use these proprietary internal sticks. Storage is soldered. Buying an FM13A or A1708 module for those laptops wastes time and creates returns. Choose the SanDisk Extreme 2TB portable—or another quality USB-C NVMe SSD—and treat capacity as an external problem.
Nearly every internal listing repeats the same warning because it is true: update the original SSD to macOS 10.13 High Sierra or later before removal. That update includes EFI firmware changes required for many third-party NVMe modules to enumerate. If the old drive is already dead and stuck on an older OS, research recovery paths before you order, and prefer kits that include a bootable USB installer.
Preinstalled macOS reduces blank-drive anxiety but does not replace a verified backup of your files. Kits with screwdrivers and USB installers are worth it for first openings. Experienced techs who already own pentalobe/Torx sets can buy bare modules and save kit overhead. Either path still requires careful battery disconnect habits and ESD awareness on older logic boards.
The better listings in this pack emphasize original pin layouts—22+34 pin for A1708 family parts, 12+16 pin style interfaces for earlier Air/Retina blades—rather than generic M.2 adapters. Native fitment is usually more stable in thin chassis. Be wary of any third-party advice that treats Apple’s proprietary SSD slot like a desktop PC M.2 socket.
No. Those machines use soldered storage. The proprietary blade upgrades in this guide are for older serviceable models such as A1708 non-Touch Bar and earlier Retina/Air chassis. For modern Pros, use a portable USB-C NVMe SSD like the SanDisk Extreme 2TB in this pack for capacity, and use Apple or a board-level shop only if the internal NAND itself has failed.
A1708 is the 13-inch non-Touch Bar model with a replaceable proprietary SSD in the configurations covered here (EMC 2978 or 3164). A1706 is a Touch Bar sibling that these A1708 sticks explicitly do not support. Visually they can look similar until you notice the Touch Bar or read the model number. Always verify the A-number before ordering an A1708-only drive.
High Sierra and later releases included EFI firmware updates that many third-party NVMe modules need in order to be recognized. If you remove a drive that never received that update, the new SSD may not appear in Disk Utility or Startup Manager. Update first, back up second, swap third. That order prevents the most common failure report in this category.
Preloads are a convenience for first boot, not a security audit of the seller. After the machine boots, create a new admin user or reinstall macOS from a trusted Apple installer if you want a clean system provenance, then migrate only the data you need from your own backup. Change passwords that may have been typed on the machine before the repair, and enable FileVault once you trust the install.
Most of these chassis are far outside Apple’s standard warranty window. You are accepting DIY risk: stripped screws, battery punctures, and cable damage are user-caused failures. If a machine still has AppleCare or a shop warranty, read those terms before opening it. Functionally, a correct native-module upgrade is a normal repair path on these older Pros and Airs.
Choose 512GB if your media already lives on external disks or in the cloud and you mainly need headroom for apps and documents. Choose 1TB if this laptop remains your primary machine and you keep photo catalogs, sample libraries, or project folders local. Opening the case twice to upsize later is more wear than buying enough capacity once.
On an upgradeable A1398 or A1708, an internal module is still better for boot volume space and leaving USB-C ports free. The Extreme shines as a rugged archive or as the primary expansion method on soldered Macs. Many careful owners end up with both: a healthy internal boot drive and a 2TB Extreme for travel footage and Time Machine or clone targets.
At minimum, the correct pentalobe driver for your bottom case and the Torx size for the SSD retaining screw on your model. A spudger, plastic cards, and a magnetic project mat help. Follow a model-specific guide for battery connector location. If you lack tools and confidence, prefer the FM13A or MZ17C kits that include drivers and a bootable USB installer.
Power down, reseat the module, and confirm the retaining screw is snug without being forced. Boot to the USB installer if you have one and look for the disk in Disk Utility. Verify you updated the original drive to 10.13+ before the swap and that your EMC is truly supported. If it still fails, contact the seller with photos of your underside sticker rather than immediately buying a different incompatible blade.
Some SKUs list iMac A1418/A1419, Mac mini A1347 2014, or Mac Pro A1481 2013 with specific EMCs. Treat each desktop as its own compatibility project—opening an iMac is not the same procedure as a MacBook Pro. Match EMC exactly, complete the High Sierra firmware step when applicable, and use a desktop-specific guide before you pull the original module.
The best SSD for a MacBook Pro in 2026 depends almost entirely on whether Apple left you a socket. For A1708 non-Touch Bar machines, the 1TB Jorkar module is our capacity pick when you already know your EMC. For Late 2013–Mid 2015 Retina Pros and Mid 2010s Airs, the FM13A 1TB DIY kit is the most complete internal path in this pack. For everything soldered—Touch Bar era through Apple Silicon—the SanDisk Extreme 2TB portable is the honest answer.
Whatever you choose, slow down for the unglamorous steps: match model and EMC, update to macOS 10.13 or later on the original drive, back up until you trust the backup, then open the case with the right drivers. Those habits matter more than any single sequential speed claim on a product page.
Treat the upgrade as one part of keeping an older Mac useful—not as a miracle. Pair a healthy SSD with realistic expectations about battery, keyboard, and performance ceilings, and you can stretch a well-chosen MacBook Pro for more careful years of work without pretending it is a brand-new machine.